Carlson RT3 | RT4 Tablet SIM Setup
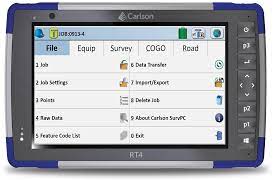
Unless otherwise noted, the RT4 instructions apply to both the RT3 and RT4.
Activate SIM
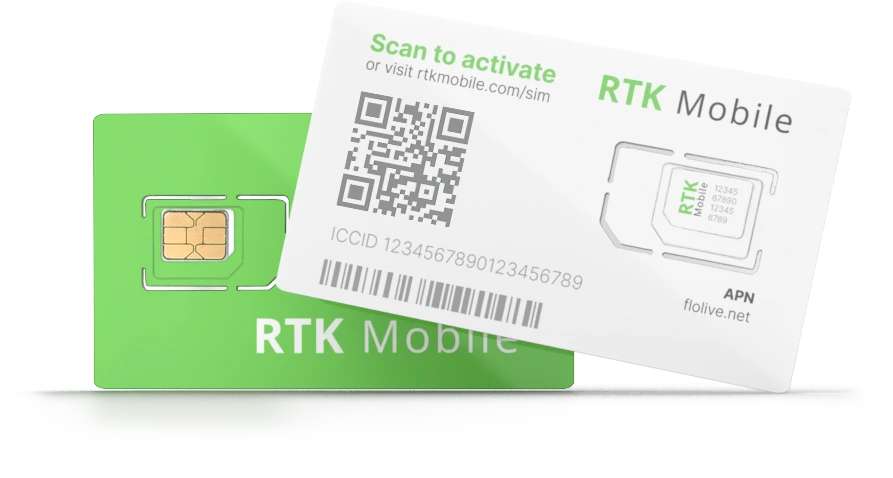
Go to our activation page and enter your ICCID or scan the QR code of your SIM Card to make sure your SIM card has been activated. The ICCID is printed on the SIM card holder QR label and on the SIM itself. If it is not activated, buy a data plan to activate the SIM.
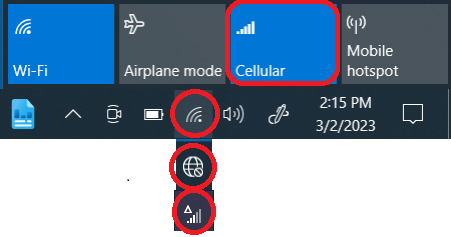
Check for CELL Support
In the lower right area of the task bar, tap the Internet icon (three types of internet icons are circled in red below) and make sure that Cellular is enabled. If the Cellular icon is not there, then your tablet may not support Cellular or the drivers may need to be installed. Here’s how to check if your tablet supports Cellular. If your RT4 doesn’t have cell support, you’ll have to install the SIM card into the rover.
Install SIM
- Turn off the RT4 by selecting “Shut down” from the power icon on the welcome screen or in the Windows menu.
- Remove the battery door by sliding the battery lock switch to the unlocked position and pulling on the edge that pops up.
- Remove the battery by pulling up on the black tab.
- If you are replacing a SIM card with a new one, it is best to take out the old SIM and start the RT4 without a SIM card inside before turning it off and putting the new one in.
- Pull down the rubber flap covering the SIM and Micro SD slots and insert the SIM with the cut corner oriented in the same direction as the Micro SIM drawing in the battery bay.
- Push back the rubber flap to protect the SIM, replace the battery and battery door.
Configure APN
In some cases the internet will start working without setting up the APN. This may happen when you connect with a T-Mobile tower, but it is temporary. You will still need to set up the APN on the data collector with the following instructions.
In the lower right area of the task bar, tap the Internet icon (three types of internet icons are circled in red below) and make sure that Cellular is enabled:
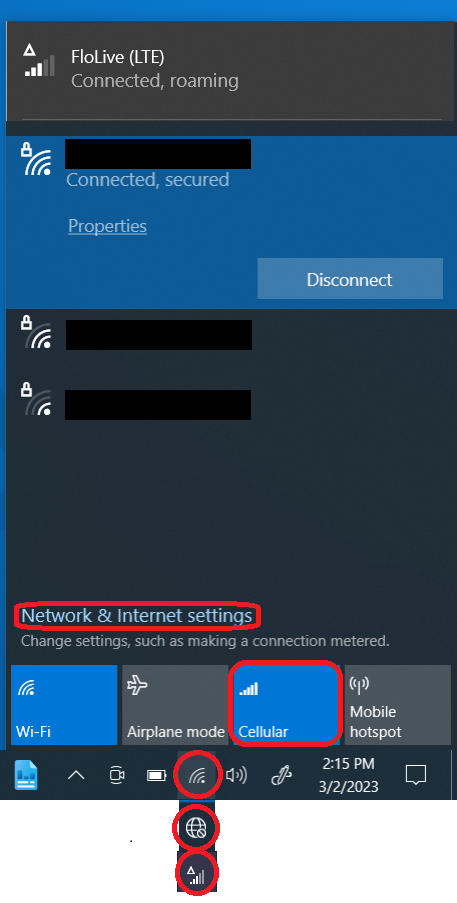
Click on Network and Internet settings in that same area.
In the Network and Internet settings dialog choose Cellular on the left side:
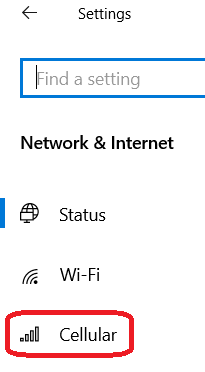
In the Cellular dialog, make sure that Roam is checked.
Downloading and Installing Skylight
Download Skylight on your RT3/RT4 by using WIFI or you can also save it to a thumb drive and copy it to your tablet. Do not download Skylight from the Microsoft app store. The Skylight version 4814 is specific for this modem and you may have problems seeing profiles with other versions.
Install Skylight with default options on the tablet.
Using Skylight to connect to flolive.net
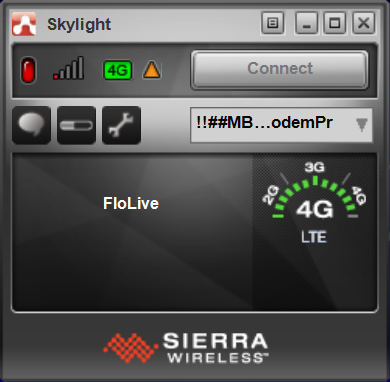
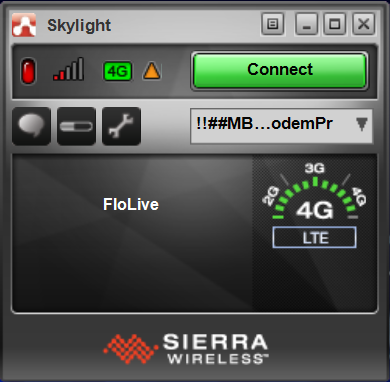
Find the Skylight icon on the Desktop and double click it.

It should look similar to this:
Cleaning Up
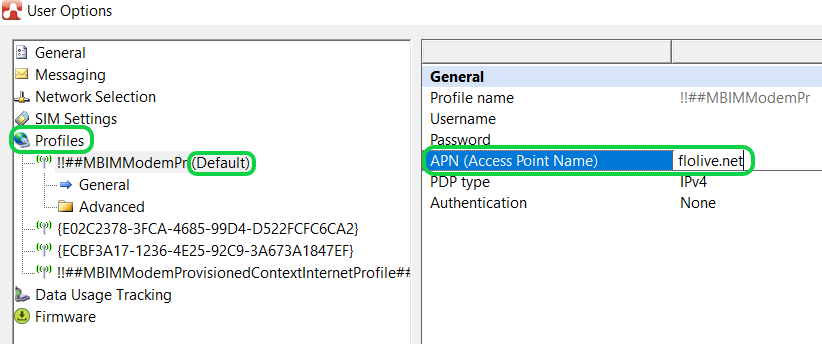
Click on the wrench icon to get to the profiles.
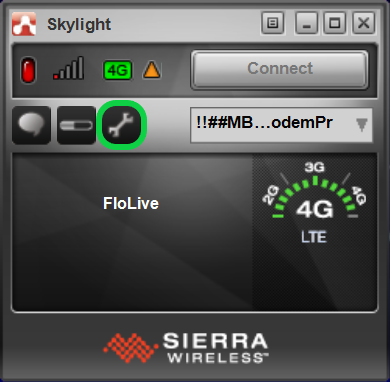
Now click on profiles and then click on the Default profile. You may need to maximize the window and slide the dividing bar to the right to see the entire name of the profiles. Change the APN to flolive.net (make sure it is spelled correctly, all lower case and no spaces before or after). Just as you see in the picture below, delete any username and password, PDP type should be IPv4 or Default, and Authentication is set to None. Once that is done, click on Apply.
You can edit all other profiles. If there a lot of profiles, you can delete some that start with { instead of editing them with the black X at the bottom. If you can’t edit or delete profiles, that usually means that you are already connected. Click on OK to confirm changes and exit User Options and go back to the main Skylight App. Windows might repopulate the one with “ProvisionedContextInternetProfile” as part of the name. This is normal as long as the APN is set up just like the Default profile we edited.
Connecting to the Internet
It might take a minute or two, but it should show this screen. If it doesn’t give the option to connect, try using the drop down below the connect button to connect to a different profile. Some tablets will require turning cellular off and on again or a reboot and then checking the profiles again. There should only be profiles with APN flolive.net with the other settings as above. After it connects, the connect button will change to a Disconnect button.
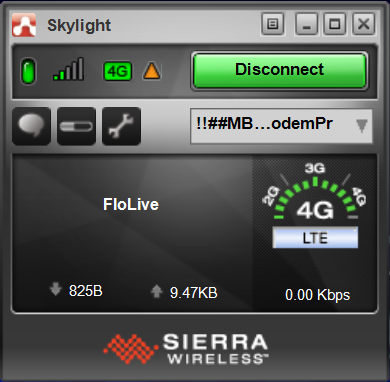
You can now close Skylight and check the system tray internet button to check on the status.
Additional Tips
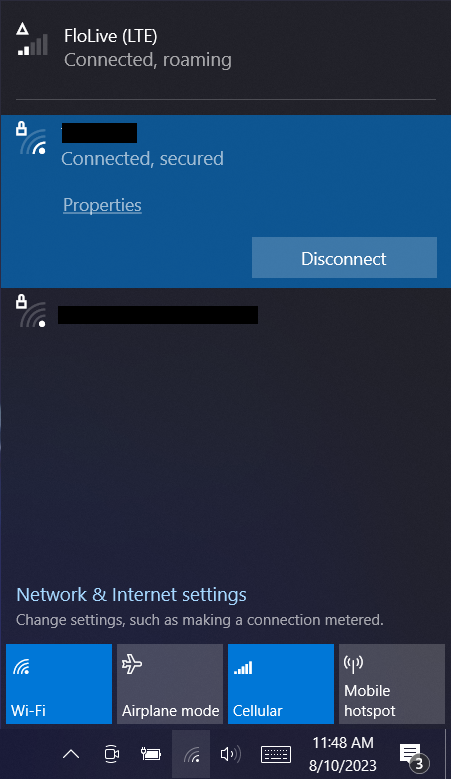
Make sure the Cellular button is on as shown above and wait two minutes to allow time for the first connection until you see “Connected, roaming“. Roaming is normal and our SIM card will only work if roaming is on. If Cellular status is still “No Service” tap the Cellular button to turn it off and again to turn it back on. You can also try restarting the tablet. If that doesn’t work or you have issues that are not related to the APN profiles, follow the RT4 Troubleshooting instructions.
Now you can configure Carlson SurvPC or Carlson Layout to send RTK corrections to your GNSS receiver:
Configure SurvPC for SIM in Tablet
Configure Carlson Layout for SIM in Tablet